Maintenance cleaner or iron remover — which do you need?
Run a finger over a clean, dry wheel. If it feels smooth, a maintenance cleaner is all you need. If it feels gritty, like fine sandpaper, those are bonded iron particles and no amount of ordinary cleaner will shift them — you need a decontaminant.
The practical routine for most people is to decontaminate once or twice a year, then keep on top of it weekly with something cheap. Iron removers are more expensive and genuinely unpleasant to smell, so using one every wash is money and misery spent for no extra benefit.
How an iron remover works
The active chemistry reacts with iron particles and dissolves them, and the reaction produces a deep purple-red bleed as it works. That color change is genuinely useful feedback: it shows you exactly where contamination is and how much of it there was. It also produces a distinctly sulfurous smell, which is unavoidable and not a sign of a faulty product. Spray, let it dwell as directed, agitate, and rinse thoroughly — never let it dry on the wheel.
Will it damage my wheels?
This is the question worth taking seriously, because a ruined finish costs far more than any cleaner. Wheels come in several finishes — painted, clear-coated, polished or bare aluminum, chrome, and anodized — and they do not all tolerate the same chemistry. Strongly acidic cleaners can stain or etch bare, polished and anodized finishes in particular.
The safe approach is simple and we would apply it regardless of what any label promises:
- Prefer cleaners listed as safe for all finishes unless you know exactly what your wheels are. Most modern factory alloys are painted or clear-coated and are the least fussy, but aftermarket polished or anodized wheels are not.
- Test an inconspicuous area firston any wheel you have not cleaned before — the inner barrel is ideal.
- Never let any wheel product dry on the surface. Work one wheel at a time, in shade, and rinse before it flashes off. A dried cleaner is how staining happens.
- Avoid strong acids on anything you cannot identify.Where a maker does not publish the pH — and most do not — treat caution as the default rather than assuming it is mild.
The cleaner is only half the job
Chemistry loosens the bond; agitation removes it. Spraying a wheel and rinsing gets the easy layer and leaves the rest, which is why people conclude their cleaner is weak when the real gap is a brush.
You want soft bristles, because rim finishes scratch exactly like paint does. A soft face brush covers most of the work, and a long slim brush reaches the inner barrel where most of the dust actually accumulates — cleaning the barrel is what stops dust migrating back onto a face you just cleaned. Our wheel brush roundup covers the options. Keep those brushes exclusively for wheels; a brush that has touched brake dust must never touch paint.
The order of operations
Sequence matters as much as product choice:
- Wheel wells first of all.The well behind the wheel holds the heaviest deposits on the vehicle and throws grit straight back onto a clean wheel, so it comes before the rim rather than after — see how to clean wheel wells.
- Wheels next, before any paint. They carry the most aggressive contamination on the car. Doing them first means any splatter lands on paint you have not yet washed.
- Cool wheels only.Never spray a cleaner onto hot brakes or wheels straight off a drive — it flashes off, stains, and does not work.
- One wheel at a time. Spray, dwell, agitate, rinse. Do not do all four then come back.
- Separate bucket, separate brushes.A third bucket for wheels keeps the grit out of your paint water entirely — see the two-bucket method.
- Then dress the tires once the wheels are clean and dry, using a tire dressing applied with a pad rather than sprayed everywhere.
The step-by-step version of that sequence, including what to do when a grey film survives the wash, is in how to clean brake dust off wheels.
A note on all-in-one wheel and tire cleaners
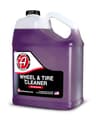
Combined products are a genuine convenience and a genuine compromise. One bottle for the wheel face, barrel, sidewall and wheel well saves time and money, and for a car kept reasonably clean that is a sensible trade. What you give up is bite: a dedicated tire cleaner strips old, layered dressing far more effectively than any combined formula. If your sidewalls are brown and blotchy from years of silicone build-up, you want the dedicated product.